
Sponsored
Sponsor This Blog
Connect with a targeted audience of iOS developers and Swift engineers. Promote your developer tools, courses, or services.
Learn More →A key feature of web browsing is the ability to move backward and forward through your navigation history. In this post, we'll explore how to handle navigation in WebView and WebPage. If you're new to WebKit in SwiftUI, check out my previous post to learn more.
Initial configuration
Here's the basic setup in our ContentView:
struct ContentView: View {
    @State private var webPage = WebPage()

    var body: some View {
        Group {
            if webPage.isLoading {
                ProgressView("Loading...", value: webPage.estimatedProgress)
                    .padding(.horizontal)
            } else {
                WebView(webPage)
                    .ignoresSafeArea(.container, edges: .bottom)
            }
        }
        .onAppear {
            let request = URLRequest(url: URL(string: "https://artemnovichkov.com")!)
            webPage.load(request)
        }
    }
}
By default, WebView supports link previews when the user performs a long press:
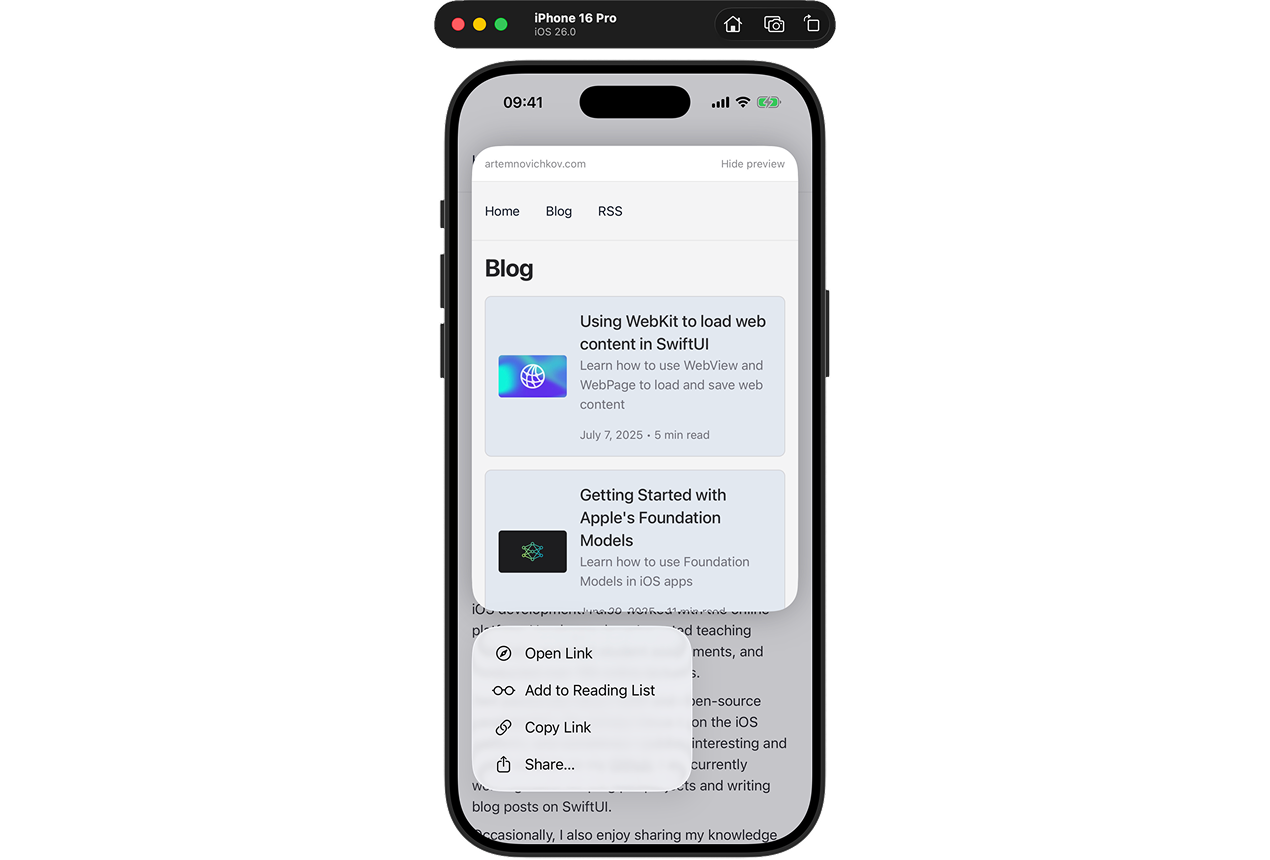
To disable it, use the webViewLinkPreviews modifier:
WebView(webPage)
    .webViewLinkPreviews(.disabled)
Moreover, WebView supports back/forward navigation gestures:
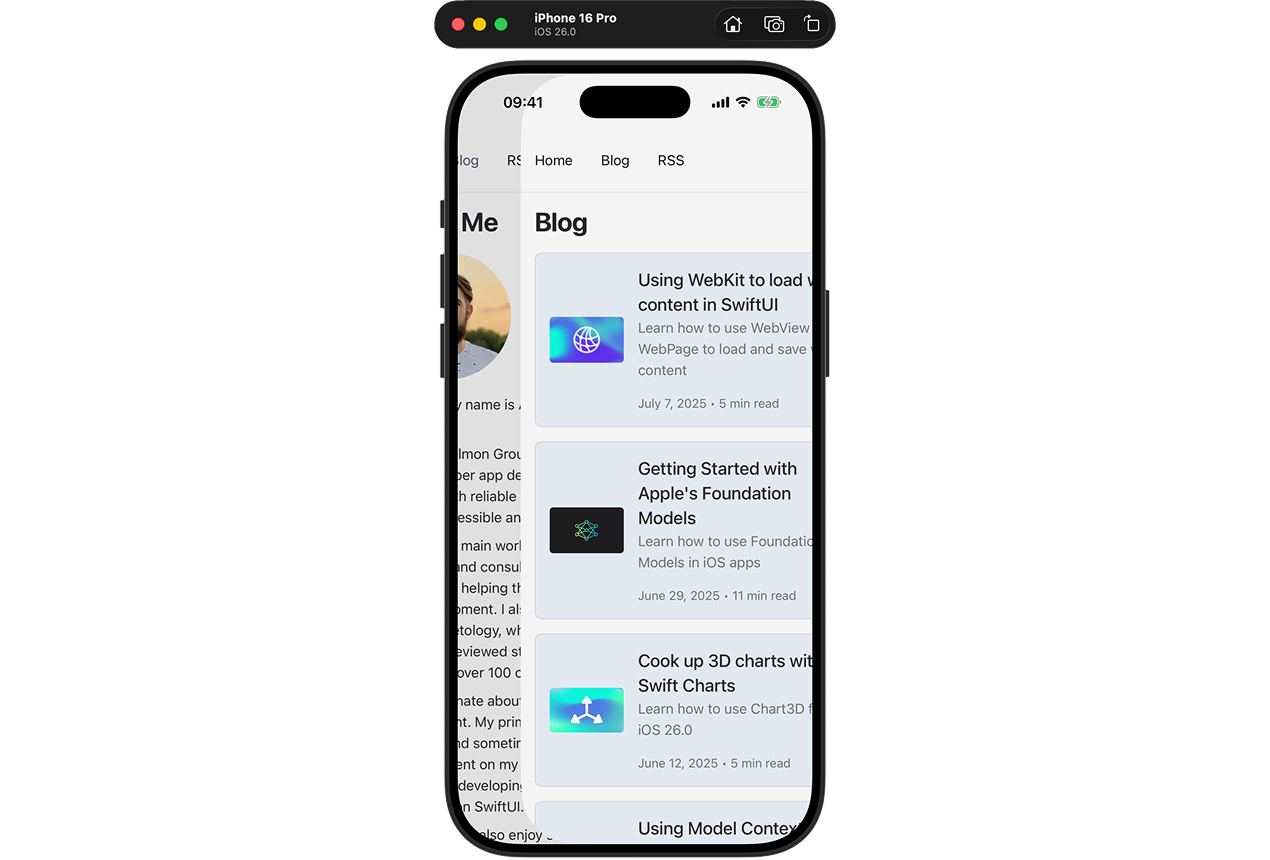
We can also disable this gesture with the corresponding modifier:
WebView(webPage)
    .webViewBackForwardNavigationGestures(.disabled)
Back/forward list navigation
To check the back/forward navigation items, we use the backForwardList property. It has two arrays: backList and forwardList. The arrays contain WebPage.BackForwardList.Item structs which represent a navigation item. Let's create a custom menu to control the navigation history:
private struct BackForwardMenu: View {
    struct LabelConfiguration {
        let text: String
        let systemImage: String
    }

    let list: [WebPage.BackForwardList.Item]
    let label: LabelConfiguration
    let navigateToItem: (WebPage.BackForwardList.Item) -> Void

    var body: some View {
        Menu {
            ForEach(list) { item in
                Button(item.title ?? item.url.absoluteString) {
                    navigateToItem(item)
                }
            }
        } label: {
            Label(label.text, systemImage: label.systemImage)
        } primaryAction: {
            navigateToItem(list.first!)
        }
        .disabled(list.isEmpty)
    }
}
Each menu displays navigation history, allowing users to quickly jump to any previous or next page. It takes a list of navigation items and a callback for loading the selected item. To use it, let's add a toolbar to the main view:
.toolbar {
    ToolbarItemGroup(placement: .bottomBar) {
        // 1
        BackForwardMenu(
            list: webPage.backForwardList.backList.reversed(),
            label: .init(text: "Backward", systemImage: "chevron.backward")
        ) { item in
            webPage.load(item)
        }
        // 2
        BackForwardMenu(
            list: webPage.backForwardList.forwardList,
            label: .init(text: "Forward", systemImage: "chevron.forward")
        ) { item in
            webPage.load(item)
        }
        Spacer()
        // 3
        Button(action: {
            webPage.reload()
        }, label: {
            Label("Reload", systemImage: "arrow.clockwise")
        })
        // 4
        if let url = webPage.url {
            ShareLink(item: url)
        }
    }
}
Let's break down the code:
- First menu displays the backward navigation history. The list is reversed to show the most recent items at the top.
- Second menu displays the forward navigation history if the user has navigated forward.
- The reload button refreshes the current page.
ShareLinkallows users to share the current page URL.
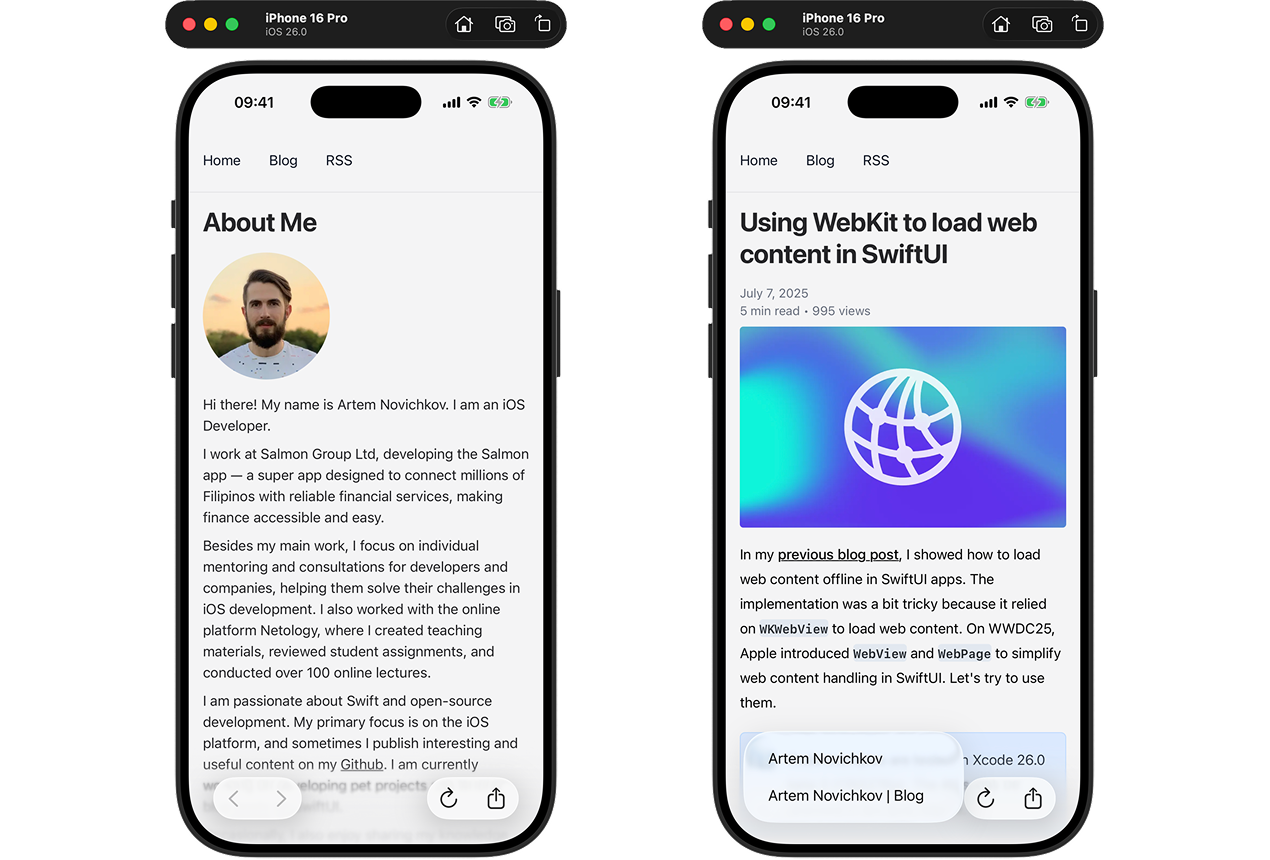
With these menus, users can navigate through the history and reload the page when needed. Here's the result:
Controlling navigation actions
Sometimes, you may want to control which URLs your web view is allowed to load. For example, you might want to restrict navigation to your own domain. This is where WebPage.NavigationDeciding comes in. Let's create a custom navigation decider:
final class NavigationDecider: WebPage.NavigationDeciding {

    var urlToOpen: ((URL?) -> Void)?

    func decidePolicy(for action: WebPage.NavigationAction, preferences: inout WebPage.NavigationPreferences) async -> WKNavigationActionPolicy {
        let url = action.request.url
        if url?.host() == "artemnovichkov.com" {
            return .allow
        }
        urlToOpen?(url)
        return .cancel
    }
}
To use it, pass it to the WebPage initializer:
// In ContentView
@Environment(\.openURL) private var openURL

.onAppear {
    let navigationDecider = NavigationDecider()
    navigationDecider.urlToOpen = { url in
        if let url {
            openURL(url)
        }
    }
    webPage = WebPage(navigationDecider: navigationDecider)
    let request = URLRequest(url: URL(string: "https://artemnovichkov.com")!)
    webPage.load(request)
}
Now, when users try to navigate to a different domain, navigation will be canceled and the link will open in the default browser.
Conclusion
In this post, you’ve learned how to handle WebView navigation in SwiftUI. If you have any questions or feedback, please let me know on X. The code is available on GitHub. Thanks for reading!
