
Sponsored
Sponsor This Blog
Connect with a targeted audience of iOS developers and Swift engineers. Promote your developer tools, courses, or services.
Learn More →In my previous blog post, I showed how to load web content offline in SwiftUI apps. The implementation was a bit tricky because it relied on WKWebView to load web content. On WWDC25, Apple introduced WebView and WebPage to simplify web content handling in SwiftUI. Let's try to use them.
Loading web content
Starting with a simple example:
import SwiftUI
import WebKit

struct ContentView: View {
    @State private var url = URL(string: "https://artemnovichkov.com")!

    var body: some View {
        WebView(url: url)
    }
}
WebView supports direct URL loading, but lacks built-in loading indicators or error handling. Add WebPage to handle loading the content:
import SwiftUI
import WebKit

struct ContentView: View {
    @State private var url = URL(string: "https://artemnovichkov.com")!
    @State private var webPage = WebPage()

    var body: some View {
        WebView(webPage)
            .onAppear {
                let request = URLRequest(url: url)
                webPage.load(request)
            }
            .onDisappear {
                webPage.stopLoading()
            }
    }
}
Additionally, WebPage provides loading state and estimated progress support:
import SwiftUI
import WebKit
struct ContentView: View {
@State private var url = URL(string: "https://artemnovichkov.com")!
@State private var webPage = WebPage()
var body: some View {
content
.onAppear {
let request = URLRequest(url: url)
webPage.load(request)
}
.onDisappear {
webPage.stopLoading()
}
}
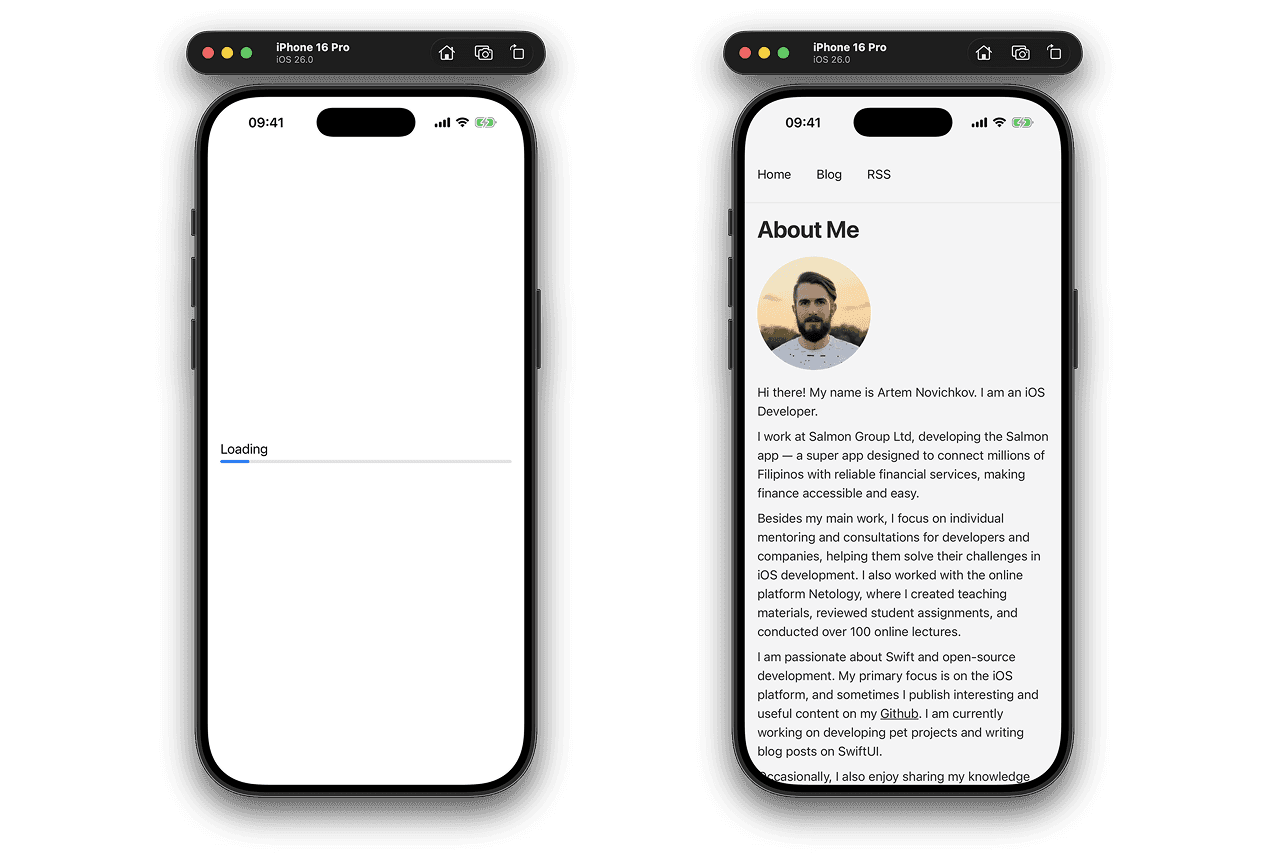
private var content: some View {
ZStack {
Color.white
if webPage.isLoading {
ProgressView("Loading", value: webPage.estimatedProgress)
.padding()
} else {
WebView(webPage)
}
}
}
}Here is the result:
To handle different states such as errors or redirects, we can observe navigation changes through the async sequence returned by load function.
Let's add controls to save content — starting with an enum for selecting content type:
enum ContentType: String, CaseIterable {
    case image = "Image"
    case pdf = "PDF"
    case webArchive = "Web Archive"
}
And a toolbar with a picker and save button:
struct ContentView: View {
    // Other states
    @State private var loaded = false
    @State private var contentType: ContentType = .image

    var body: some View {
        content
            .toolbar {
                ToolbarSpacer(placement: .bottomBar)
                ToolbarItem(placement: .bottomBar) {
                    Picker("Content Type", selection: $contentType) {
                        ForEach(ContentType.allCases, id: \.self) { contentType in
                            Text(contentType.rawValue)
                                .tag(contentType)
                        }
                    }
                    .tint(.primary)
                    .fixedSize()
                }
                ToolbarItem(placement: .bottomBar) {
                    Button("Save", systemImage: "square.and.arrow.down") {
                        // Save content
                    }
                    .disabled(!loaded)
                }
            }
            .onAppear {
                let request = URLRequest(url: url)
                Task {
                    for try await event in webPage.load(request) {
                        if event == .committed {
                            loaded = true
                        }
                    }
                }
            }
            .onDisappear {
                webPage.stopLoading()
            }
    }
}
The picker remains disabled until the web content finishes loading. Here is the picker in action:
Saving web content locally
WebPage supports Transferable protocol, so we can export its content to various types:
- image;
- PDF;
- web archive data.
For images and PDFs, we may use WebPage.ExportedContentConfiguration struct to configure additional options like region of a webpage or transparent background.
Task {
    // Export as image
    let imageData = try await webPage.exported(as: .image(region: .contents))
    // Export as PDF
    let pdfData = try await webPage.exported(as: .pdf(allowTransparentBackground: true))
}
If you don't need to configure the exported content, we can use exported(as:) function with UTType:
import UniformTypeIdentifiers

Task {
    let webArchiveData = try await webPage.exported(as: .webArchive)
}
Now we can save the content based on the selected type:
private func save() {
    Task {
        do {
            let data = try await webPage.exported(as: contentType.type)
            let fileManager = FileManager.default
            let url = fileManager.urls(for: .documentDirectory, in: .userDomainMask)[0]
                .appendingPathComponent("data")
                .appendingPathExtension(contentType.pathExtension)
            fileManager.createFile(atPath: url.path(), contents: data)
        }
        catch {
            print("Error saving content: \(error)")
        }
    }
}

extension ContentType {

    var type: UTType {
        switch self {
        case .image: .image
        case .pdf: .pdf
        case .webarchive: .webArchive
        }
    }

    var pathExtension: String {
        if let preferredFilenameExtension = type.preferredFilenameExtension {
            return preferredFilenameExtension
        }
        return switch self {
        case .image: "png"
        case .pdf: "pdf"
        case .webarchive: "webarchive"
        }
    }
}
Showing saved content
To display image and PDF files, I reused code from the previous blog post. For web archive data, the new WebView can be used directly:
import SwiftUI
import WebKit

struct WebArchiveView: View {

    let url: URL
    @State private var webPage = WebPage()

    var body: some View {
        WebView(webPage)
            .onAppear {
                guard let data = FileManager.default.contents(atPath: url.path()) else {
                    print("Failed to load web archive data from \(url.path())")
                    return
                }
                let baseURL = URL(string: "about:blank")!
                webPage.load(data, mimeType: "application/x-webarchive", characterEncoding: .utf8, baseURL: baseURL)
            }
    }
}
Conclusion
New APIs simplify web content handling in SwiftUI. I didn't cover all the features, like url schemes or JavaScript calling, but you can find more details in the official documentation or WWDC video. The complete sample project is available on Github. Thanks for reading!

