Sponsored
Sponsor This Blog
Connect with a targeted audience of iOS developers and Swift engineers. Promote your developer tools, courses, or services.
Learn More →In a previous post we explored the features of TextEditor in SwiftUI. In this article, we'll dive into the Natural Language framework and how to use it to analyze text in real time.
Natural Language is a framework that provides a set of tools for analyzing and processing text. It can be used to detect the language of a text, tokenize it, find similarities between pieces of text, etc. It is particularly useful when working with user inputs that require natural language processing. Let's start with searching.
Smart text searching with context understanding
Let's imagine that we have a note-taking app and we want to implement a search feature. How can we do it? The simplest way is to search for an exact match of the text. Let's start with a simple view:
import SwiftUI

struct ContentView: View {

    @State private var notes: [String] = ["My day was good",
                                          "My day is not so good"]
    @State private var searchText: String = ""

    var body: some View {
        NavigationView {
            List {
                ForEach(searchNotes, id: \.self) { note in
                    Text(note)
                }
            }
        }
        .searchable(text: $searchText)
    }

    private var searchNotes: [String] {
        if searchText.isEmpty {
            return notes
        }
        return notes.filter { note in
            note.lowercased().contains(searchText.lowercased())
        }
    }
}
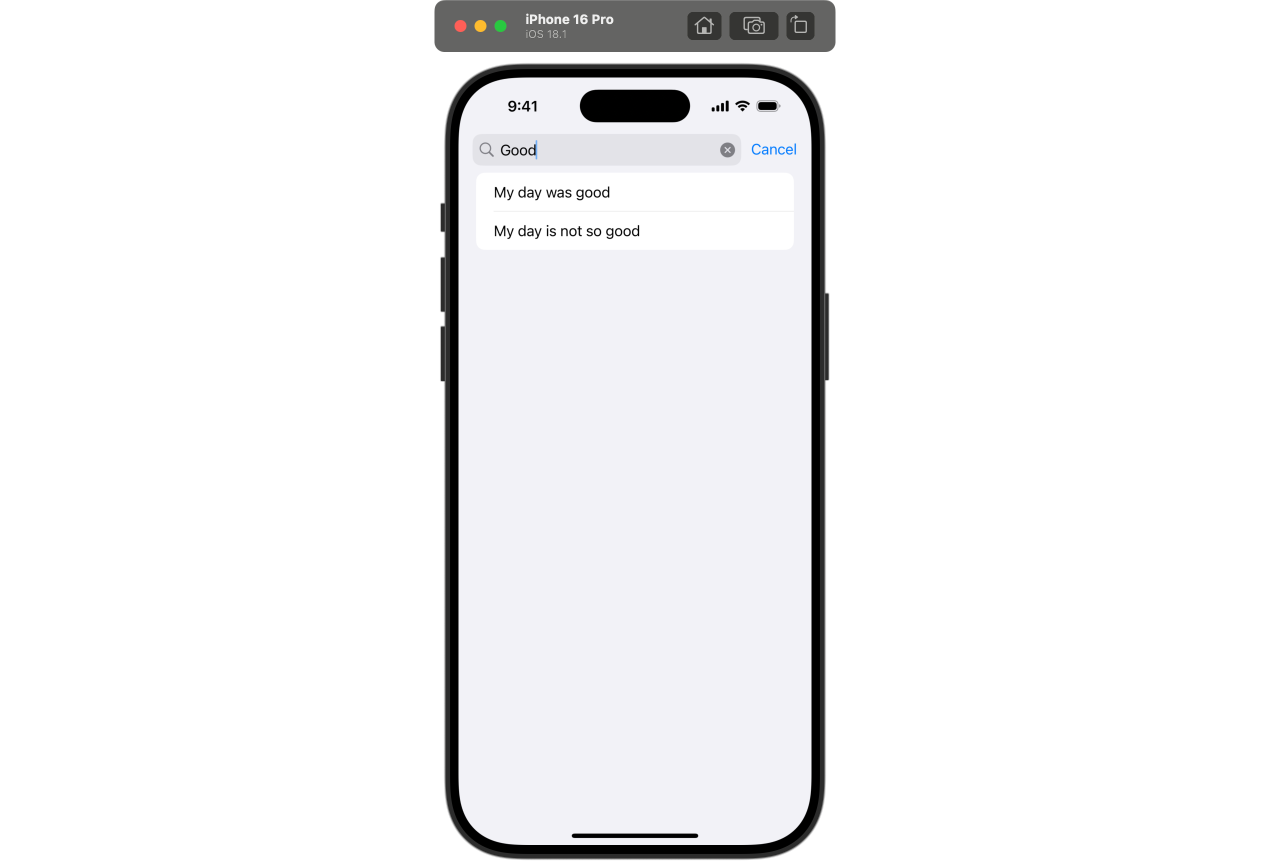
Here is List with notes and a searchable modifier. When the user starts typing in the search bar, the list will be filtered by the search text:

Pay attention to the notes:
- "My day was good"
- "My day is not so good"
The search works as expected, but it doesn't take into account the meaning of the text. But what if the user wants to find notes with a positive meaning?
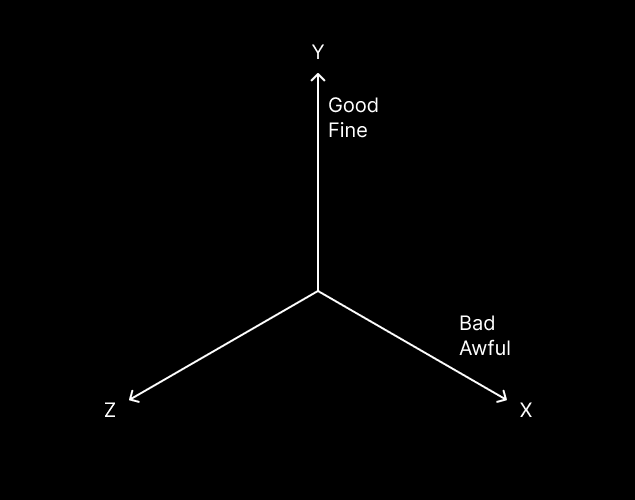
NLEmbedding class finds similar strings based on the proximity of their vectors. Every word or sentence can be represents as a vector, it's an array of 512 double values. This vector encodes the meaning of the string in the vector space:

Let's create a sentence embedding, it's available from iOS 14.0.
import NaturalLanguage

let sentenceEmbedding = NLEmbedding.sentenceEmbedding(for: .english)!
NLEmbedding is language-specific, so we must set the language. The set of supported languages is limited, for instance, it doesn't support Russian or Kazakh languages. We'll handle it in the next section, so let's continue with English. We can check the vectors of our notes:
print(sentenceEmbedding.vector(for: "My day was good"))
// prints [-0.15248329937458038, 0.4077046811580658...0.32297080755233765, 0.2538180649280548]
print(sentenceEmbedding.vector(for: "My day is not so good"))
// prints [-0.13080675899982452, -0.05954701825976372...0.2555568516254425, 0.1614433228969574]
Now it's time to improve the searching:
return notes.filter { note in
    let distance = sentenceEmbedding.distance(between: searchText, and: note)
    return distance < 1
}
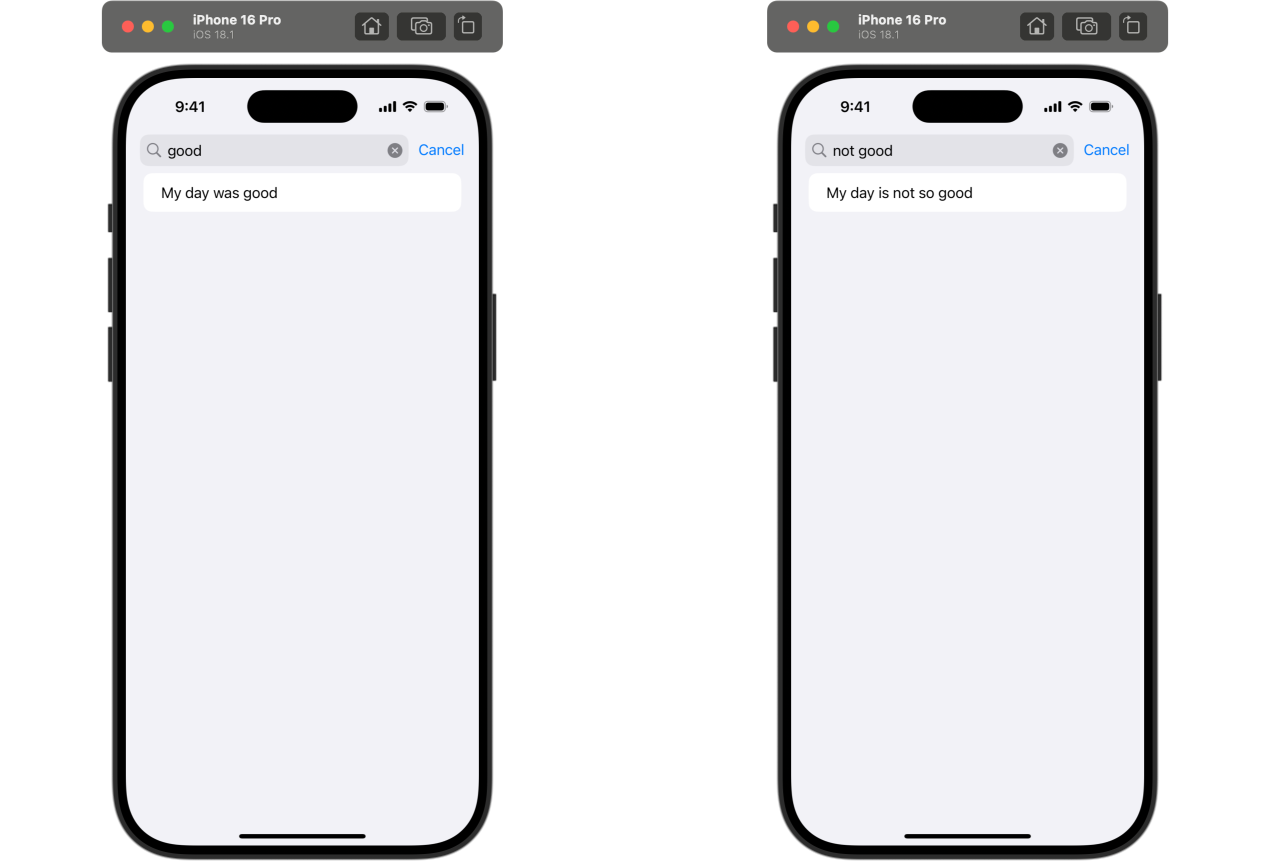
The embedding can calculate the distance between two strings. The algorithm is based on cosine similarity. Checking the distance here is very naive. It really depends on content types and may be different. Here's the result:

Checking sentiment score
The next useful feature is a sentiment score. How did the user feel when they wrote the note? Was it positive or negative? NLTagger class can help us with this. It's a class that provides a way to analyze text and tag it with information like part of speech, named entities, or sentiment score.
Before using NLTagger, we need to check if the sentiment score is available for the language of the text:
guard let dominantLanguage = NLLanguageRecognizer.dominantLanguage(for: text) else {
    return
}
let availableTagSchemes = NLTagger.availableTagSchemes(for: .paragraph, language: dominantLanguage)
guard availableTagSchemes.contains(.sentimentScore) else {
    return
}
An interesting thing here that the sentiment score is available only for the paragraph unit, not for the word or sentence. It's ok for our case and will work for the notes.
Now we can create a tagger and set the text:
let tagger = NLTagger(tagSchemes: [.sentimentScore])
tagger.string = text
The tagger provides functions to get a tag for a specific index or to enumerate all tags. We'll check the tag in the first paragraph:
let (sentimentTag, _) = tagger.tag(at: text.startIndex,
                                   unit: .paragraph,
                                   scheme: .sentimentScore)
guard let sentimentTag else {
    return
}
let score = Double(sentimentTag.rawValue) ?? 0
print(score)
// prints -0.4 for "My day was good"
The score is a double value from -1 to 1. It may be useful for various cases like analyzing reviews, comments, or social media posts. Let's try to visualize the score.
Visualizing sentiment score with MeshGradient
Since iOS 18.0 we can use mesh gradients to create complex gradients and mix colors in a more flexible and efficient way. Let's start with an example from the documentation:
MeshGradient(width: 3, height: 3, points: [
    .init(0, 0), .init(0.5, 0), .init(1, 0),
    .init(0, 0.5), .init(0.5, 0.5), .init(1, 0.5),
    .init(0, 1), .init(0.5, 1), .init(1, 1)
], colors: [
    .red, .purple, .indigo,
    .orange, .white, .blue,
    .yellow, .green, .mint
])
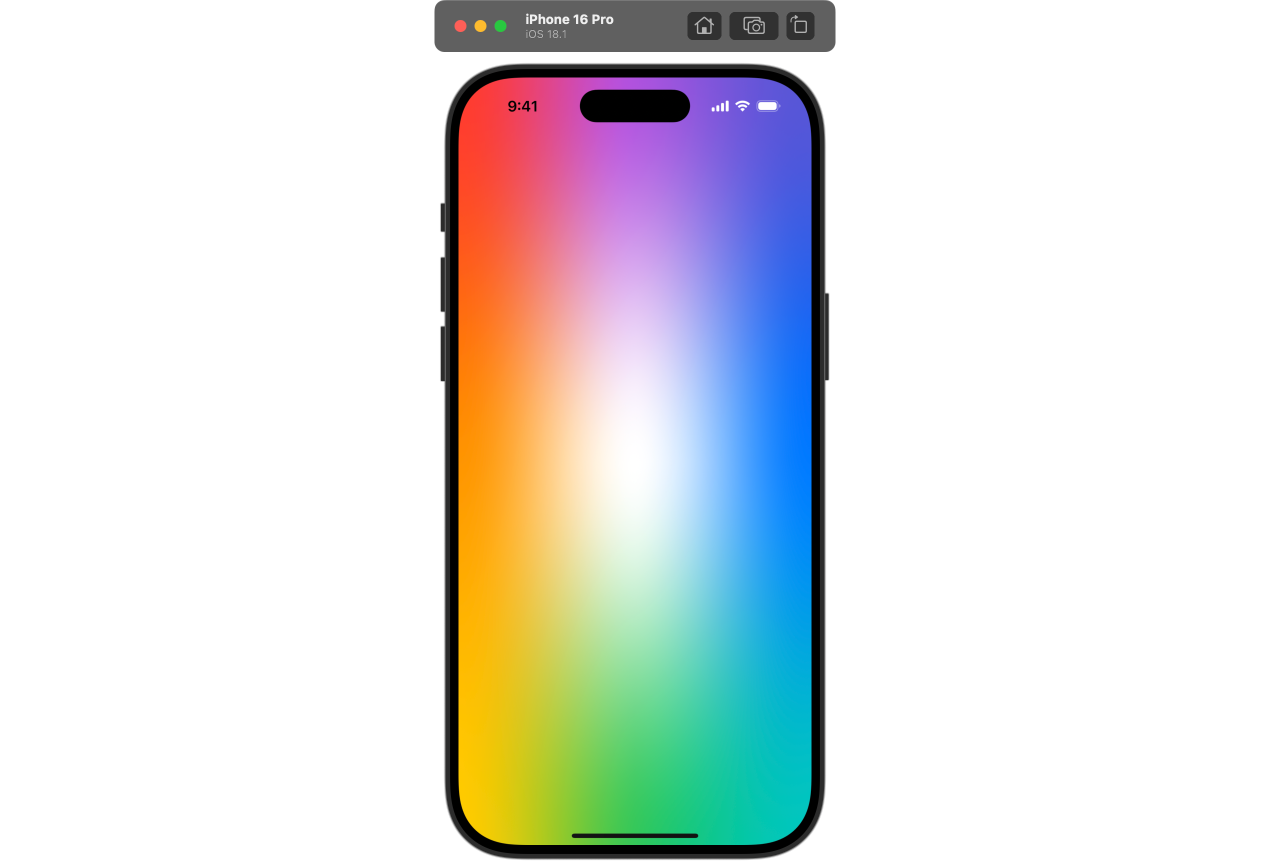
Here we have 3x3 size with 9 control points and 9 colors:

Looks great! Let's create an enum for the sentiment score. We'll calculates it based on the sentiment score and update the colors of the mesh gradient.
enum Sentiment {
    case negative
    case neutral
    case positive
}
And now we'll create a view for note editing. The top view is a TextEditor with a mesh gradient background:
struct NoteView: View {

    @State var note: String
    @State private var sentiment: Sentiment = .neutral

    var body: some View {
        TextEditor(text: $note)
            .multilineTextAlignment(.center)
            .scrollContentBackground(.hidden)
            .foregroundStyle(.white)
            .font(.system(size: 40, weight: .thin, design: .serif))
            .background {
                MeshGradient(width: 4, height: 4, points: [
                    [0, 0],    [0.25, 0],    [0.5, 0],    [1, 0],
                    [0, 0.25], [0.25, 0.25], [0.5, 0.25], [1, 0.25],
                    [0, 0.75], [0.25, 0.75], [0.5, 0.75], [1, 0.75],
                    [0, 1],    [0.25, 1],    [0.5, 1],    [1, 1]
                ], colors: sentimentColors)
            }
            .ignoresSafeArea()
            .onAppear {
                sentiment = sentiment(for: note)
            }
            .onChange(of: note) {
                sentiment = sentiment(for: note)
            }
    }

    private var sentimentColors: [Color] {
        // Different colors for sentiments
    }

    private func sentiment(for text: String) -> Sentiment {
        // Calculating sentiment with NSTagger's sentiment score
    }
}
I played with different control points and colors and created sentimentColors with red, blue, and green gamut. sentiment(for:) function uses NLTagger to determine the corresponding Sentiment value. I tried to find the best ranges and chose the following:
private func sentiment(for text: String) -> Sentiment {
    let score = ... // Calculating sentiment score with NSTagger
    if score < -0.6 {
        return .negative
    } else if score >= 0.2 {
        return  .positive
    } else {
        return .neutral
    }
}
Here is a small demo of the final result:
If you want to try the full code, you can find it in NaturalLanguageExample repository.
Conclusion
The Natural Language framework is a powerful tool for text analysis, but it is rarely used (I don't know why 🤷). It's free, fast and works offline. A small flaw that spoils the whole thing is supported languages. If you have a worldwide audience and want to add sentiment analysis, you'll face limitations due to language support. However, it's a good opportunity to use Core ML and train your own models! We will be exploring it in a text post. Stay tuned and thanks for reading!

